How to Create a Digital Business Card (Step-by-Step Guide)
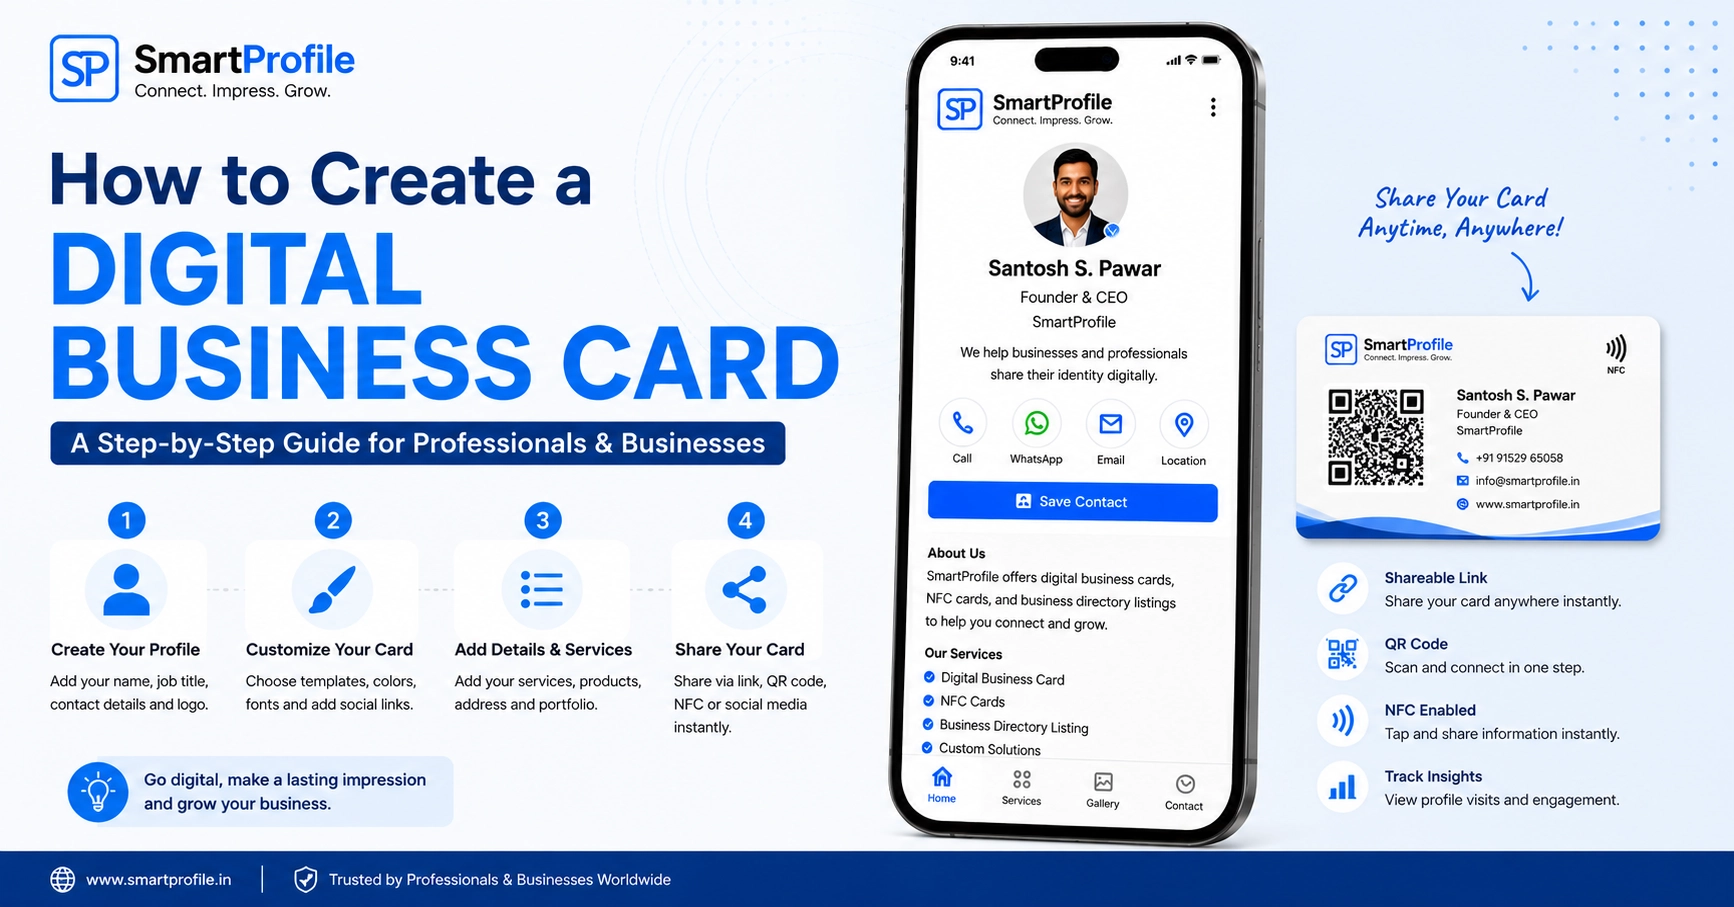
If you already know what a digital business card (also called a digital visiting card) is and you're ready to set one up, this guide walks you through the actual steps — from creating your account to sharing your first profile link.
The whole process typically takes under ten minutes, and none of it is permanent — you can update every detail later, so there's no pressure to get it perfect on the first try. If you're still deciding whether a digital business card is right for you, it might help to first read our guide on what a digital business card is and how it works.
Step 1: Create Your Account
Start by signing up with your name, email, and a password. This becomes your permanent login — the same account you'll use to edit your profile, upgrade your plan, or add products later, so use an email you'll keep long-term.
Step 2: Choose Who the Card Is For
Next, you'll specify who this digital card represents — an individual professional or a business. This determines how your profile is framed and what fields are most relevant to fill in.
Step 3: Add Your Business Details
This is the core of your profile. You'll fill in:
Category — what kind of business or profession you're in, which also helps with directory discoverability
Tagline — a short line describing what you do
Designation — your role or title
Address, Area/Locality, State, and Pincode — your location details
Google Maps URL — so people can find you easily if location matters for your business
Filling these in accurately matters more than filling them in perfectly — you can refine the wording anytime from your dashboard. Not sure what to include? See our guide on what to put on your digital business card.
Step 4: Add Contact and Sharing Options
Add your WhatsApp number, email, and website if you have one. These become the one-tap action buttons on your profile — Call, WhatsApp, Email — that let people reach you instantly without typing anything.
Step 5: Review and Publish
Once your details are filled in, review your profile and publish it. You'll get a permanent link — smartprofile.in/yourname — that represents your digital business card from that point forward.
Step 6: Share Your Profile
Your profile link is ready to use immediately. A few common ways to share it:
Send it directly over WhatsApp or email.
Add it to your Instagram or LinkedIn bio.
Generate a QR code that opens it.
Pair it with a tap-to-share NFC card for in-person networking.
Because it's a link, you can share it across WhatsApp, email, social media, QR codes, websites, and other channels.
Choosing a Good Username
Your profile link is built around the username you choose — for example, smartprofile.in/yourname. A few things worth keeping in mind when picking one:
Keep it recognizable. Using your actual name or business name makes the link easy for people to remember and trust when they see it.
Avoid special characters where possible. A clean, simple username is easier to say out loud, print on a card, or type from memory.
Think long-term. Since this link may end up on printed materials, QR codes, or NFC cards, it's worth choosing something you're comfortable keeping permanently rather than something tied to a temporary campaign or role.
Common Mistakes to Avoid When Setting Up Your Card
A few small oversights can weaken an otherwise good profile (see our full guide on digital business card mistakes for more):
Leaving fields blank "for now." An incomplete profile with missing contact options gives visitors fewer ways to reach you. Even a rough first version of every section is better than an empty one.
Skipping the tagline. A short, clear tagline tells someone at a glance what you do — skipping it means they have to dig for that context instead.
Using a low-quality or stretched image. A blurry logo or an oddly cropped banner undercuts the professional impression the rest of the profile is trying to create.
Forgetting to test the link. Before sharing your profile widely, open it yourself on a phone to check that everything displays correctly and every button actually works.
Never updating it again. The biggest advantage of a digital card over paper is that it can stay current — treat it that way by revisiting it whenever your details change, rather than setting it up once and forgetting about it.
What to Do After Publishing
Once your card is live, a few things are worth doing early:
Add a logo and banner image. A profile with visuals looks noticeably more professional than a text-only one. Keep to the recommended image sizes so nothing looks stretched or cropped.
Fill in your services or products. If your plan includes this, adding even a short list gives visitors more reason to trust and contact you.
Check how it looks on mobile. Most people will view your profile on their phone, so a quick check ensures everything displays the way you expect.
Consider submitting to the directory. If you want to be discoverable by people searching by category and location rather than people who already have your link, look into listing your business in the directory as a complementary next step.
Come back and update it. Unlike a paper card, there's no cost to keeping your profile current — update your number, add a new service, or refresh your tagline whenever something changes.
It's also worth deciding early whether you'll pair your digital card with a physical NFC card. Many people start with just the digital profile — sharing it as a link or QR code — and add an NFC card later once they've settled on their final details and want a faster way to share it in person.

Frequently Asked Questions
Ready to get started? You can create your free profile now, or see a live demo first if you want to explore how a finished profile looks.